But before moving forward, check out some articles that can help you improve your photographs even further:
The best apps to make collages on Instagram Apps to correct imperfections in photographs Apps to Improve the Android Camera
Ready? Let’s go!
1. Use the iPhone camera shortcut
Taking advantage of the moment is fundamental in a photograph and therefore using the shortcut to take a picture is our first tip. The iPhone allows you to use other applications and with them, your photographs gain much more quality, but the truth is that there are times when it is impossible to use them! Until you unlock your phone, find the app, open it, and more, the moment to take those perfect pictures is gone! To do so is very simple. First of all, you need to find your iPhone shortcut which is at the bottom bart of your screen.
Then slide to the side and voila! Your camera is open and ready to use.
2. Using external apps
The native iPhone app for taking pictures is excellent but… it could be better! To solve some of these problems, there are other very interesting apps. And you’ll need to use them if you want to take the perfect shot! There are currently numerous applications for this, but just below we leave a list of the best options on the market:
ProShot: Click here to download VSCO Cam: Click here to download Pro Camera.: Click here to download Camera+: Click here to download Manual: Click here to download
3. Have a good margin to the center
When shooting your photo, always try to leave some margin behind your main point. The reason is very simple: when in the future you want to crop or change the size to fit better, you’ll have room to do so. On the other hand, if there is no distance to other points, you may have to throw your photo in the “trash”. To help you with this task, the iPhone gives you 3 shooting options: the normal photo, the square, or the panoramic version. Use each of them depending on your ultimate goal to take perfect pictures.
4. Follow the rule of the thirds
Many iPhone users don’t know, but Apple’s smartphone gives the option to divide the screen into 9 parts. To do this, just go to the settings.
Then, click on Camera
And then, just turn on the Grid option
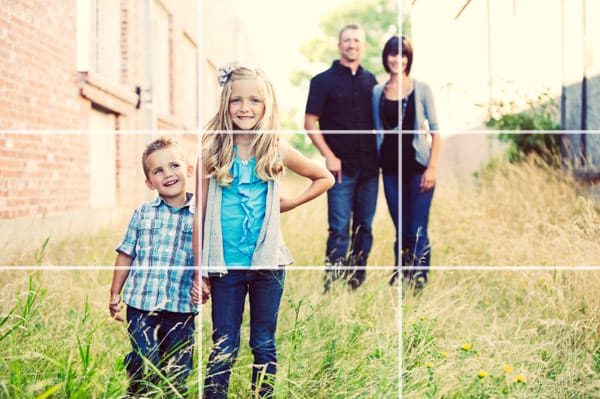
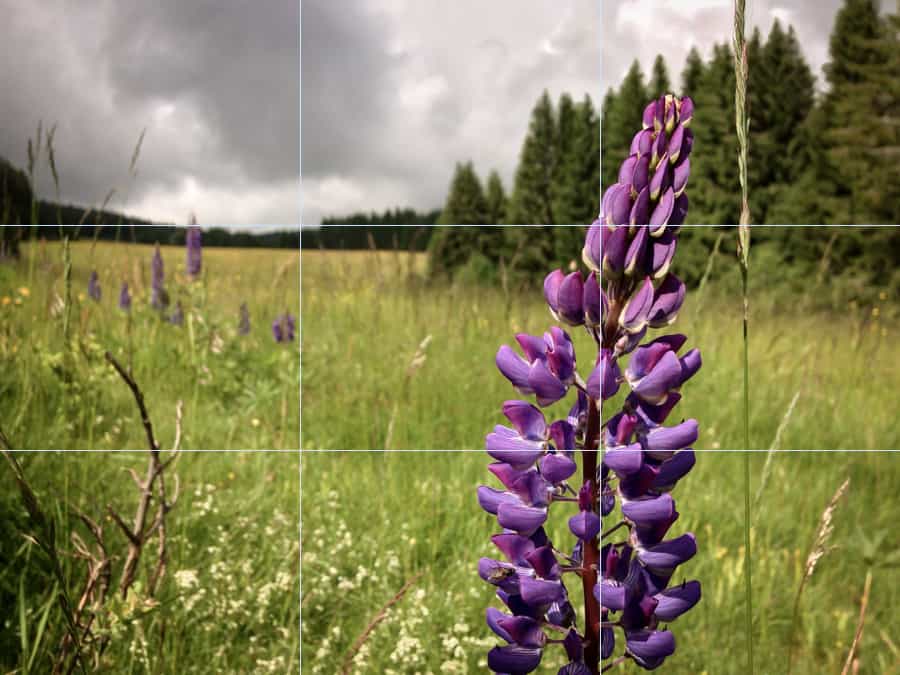
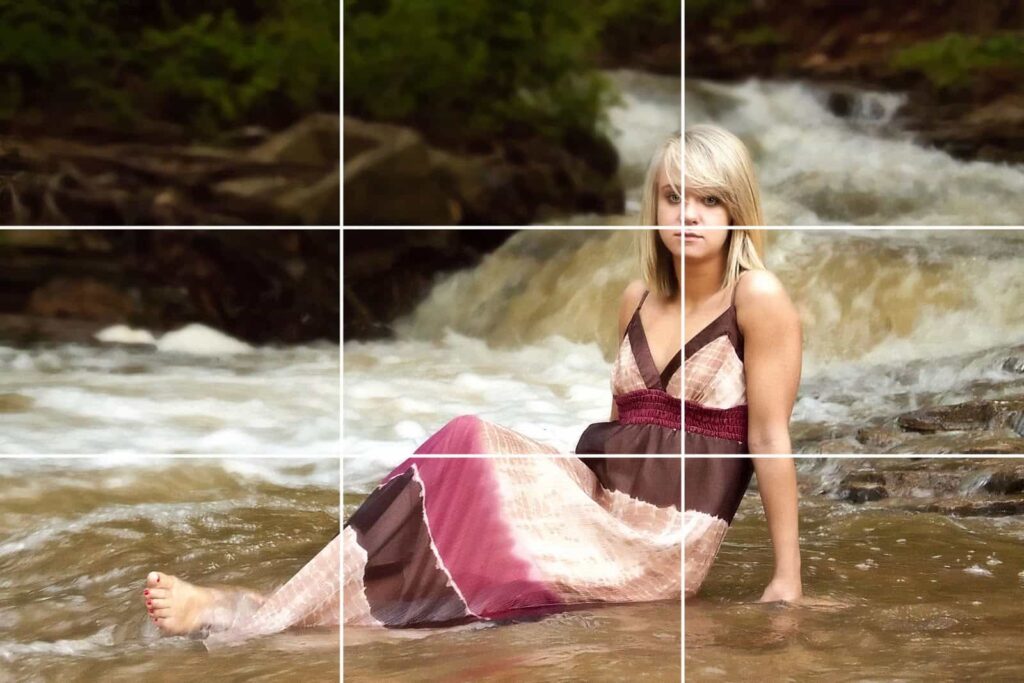
When turning on this option, you will see that the screen is divided into 9. But what is this for anyway? In fact, the rule of thirds is not unique to the iPhone. It has been used by photographers for many years, and what Apple did was introduce this technique to its users in order to help you take perfect pictures. According to the rule of thirds, the most important element(s) in your photograph must always be at the intersection of the lines. Here are some examples of where this happens:
5. Turn off your iPhone’s Flash
Flash is great, but nothing beats natural light. So, if you are going to take pictures during the day, the Flash must be turned off. If you want some light help, I advise you to check out The Pocket Spotlight. Obviously, you will always have to carry extra material, but certainly, the quality of your photographs will thank you.
6. Use the Burst Mode
Another interesting feature of the iPhone app is that you can take multiple photos consecutively, making it easier to take perfect pictures. This option is great for moving situations like sports, photos of moving cars, shooting goals, etc. This way you take multiple photos and it’s easier to find the “perfect shot”. To do this, just keep clicking the central button to take pictures and the iPhone automatically shoots several photos simultaneously. However, keep in mind that you can only focus once, before the first shot takes place.
7. Turn on HDR
As we explained in the article about tricks for the iPhone, HDR can be an excellent help when taking pictures. What HDR does is take 2 photos simultaneously, getting the best quality of both afterward. By default, Smart HDR will be turned on, always using HDR when it thinks it benefits the most. If you want to choose when to use the feature, you need to go to the Settings, Camera, and turn off Smart HDR.
Then, to activate HDR, just open the iPhone’s native photo app and click on “HDR“. When the HDR icon at the top doesn’t have a line through it, that means it is turned on.
8. Tap to increase your focus
If you’re taking a photo that contains a lot of objects, it’s normal for the iPhone to try to focus on all of them. However, you can focus on just one. To do so, just press on the part of the image you want to focus on. Do this until you see that the focus square is locked into place, which means the camera is focusing on that particular spot.
9. Use the filters
With the arrival of Instagram, the use of filters was one of the main innovations that appeared in Apple’s photography app. To go to the filters, first tap on the arrow at the top and then click on the three circles option as shown below
Then, just choose the filter you want to use.
And then just check out the result!
10. Take your pictures with the volume button
This is a tip that many are unaware of but which is extremely useful. The iPhone allows you to take pictures with the volume button, which makes it simpler to take perfect pictures. To do this, just have the camera app open and click on the volume button.
Bonus
In addition to these tips for taking great photos with your iPhone, there are still others you can use, such as:
Take photos with the volume button on your iPhone headset. It has the same effect as our tip number 10. Take pictures from a lower position. The natural tendency is to take pictures at the same height as the object you want to photograph, but often a lower position allows for better angles. Include shadows in your photos. Shadows always look good in a photograph. Consider using them with your iPhone. If possible, do not use zoom. The Zoom of all cameras detracts from the quality of the photograph. If you can, approach the object by walking.
If you think these tips are useful, share it with that family member who always takes poor pictures!


